안드로이드 개발 예제
Android Custom Dialog
사용자 정의 다이얼로그
커스텀 다이얼로그 만들기
초간단 예제
복잡한 설명은 다 생략하고 최대한 간단히 알아보자.
1. Custom Dialog란?
2. Custom Dialog 사용 과정
3. 예제
1. Custom Dialog란?
AlertDialog의 한계를 극복하고 직접 화면을 디자인하는 다이얼로그이다.
2. Custom Dialog 사용 과정
커스텀 다이얼로그의 사용 과정은 간단하다.
화면(xml) 만들기 -> 코드(java) 연결 -> 띄워서 사용하기!
1) 커스텀 다이얼로그 레이아웃 xml 디자인
원하는 대로 디자인하면 된다.
예제에서는 텍스트뷰 하나와 버튼 두 개를 만들어 보자.
2) 커스텀 다이얼로그 초기화
다이얼로그 생성
Dialog dialog01;
dialog01 = new Dialog(MainActivity.this);
레이아웃에 연결
dialog01.setContentView(R.layout.dialog01);
3) 커스텀 다이얼로그 띄우기와 닫기
띄우기
dialog01.show();
닫기
dialog01.dismiss();
3. 예제
1) activity_main.xml
다이얼로그를 띄워주는 버튼을 하나 만들어준다.
|
1
2
3
4
5
6
7
8
9
10
11
12
13
14
|
<?xml version="1.0" encoding="utf-8"?>
<LinearLayout xmlns:android="http://schemas.android.com/apk/res/android"
android:layout_width="match_parent"
android:layout_height="match_parent"
android:orientation="vertical"
android:gravity="center">
<Button
android:id="@+id/showBtn"
android:text="show!"
android:layout_width="wrap_content"
android:layout_height="wrap_content"/>
</LinearLayout>
|
cs |
2) dialog01.xml
커스텀 다이얼로그 화면이다.
원하는 대로 디자인하면 된다.
여기서는 텍스트뷰 하나와 버튼 두 개를 만들어준다.
|
1
2
3
4
5
6
7
8
9
10
11
12
13
14
15
16
17
18
19
20
21
22
23
24
25
26
27
28
29
30
31
32
33
|
<?xml version="1.0" encoding="utf-8"?>
<LinearLayout xmlns:android="http://schemas.android.com/apk/res/android"
android:layout_width="wrap_content"
android:layout_height="wrap_content"
android:layout_gravity="center"
android:orientation="vertical">
<TextView
android:layout_width="wrap_content"
android:layout_height="wrap_content"
android:padding="20dp"
android:text="앱을 종료하시겠습니까?" />
<LinearLayout
android:layout_width="match_parent"
android:layout_height="wrap_content">
<Button
android:id="@+id/noBtn"
android:layout_width="0dp"
android:layout_height="wrap_content"
android:layout_weight="1"
android:text="아니오" />
<Button
android:id="@+id/yesBtn"
android:layout_width="0dp"
android:layout_height="wrap_content"
android:layout_weight="1"
android:text="네" />
</LinearLayout>
</LinearLayout>
|
cs |
3) MainActivity.java
다이얼로그를 여러 개 만들거나 구현하려는 코드가 길어질 수 있으므로
함수로 관리하는 것이 편하다.
|
1
2
3
4
5
6
7
8
9
10
11
12
13
14
15
16
17
18
19
20
21
22
23
24
25
26
27
28
29
30
31
32
33
34
35
36
37
38
39
40
41
42
43
44
45
46
47
48
49
50
51
52
|
public class MainActivity extends AppCompatActivity {
Dialog dilaog01; // 커스텀 다이얼로그
@Override
protected void onCreate(Bundle savedInstanceState) {
super.onCreate(savedInstanceState);
setContentView(R.layout.activity_main);
dilaog01 = new Dialog(MainActivity.this); // Dialog 초기화
dilaog01.requestWindowFeature(Window.FEATURE_NO_TITLE); // 타이틀 제거
dilaog01.setContentView(R.layout.dilaog01); // xml 레이아웃 파일과 연결
// 버튼: 커스텀 다이얼로그 띄우기
findViewById(R.id.showBtn).setOnClickListener(new View.OnClickListener() {
@Override
public void onClick(View view) {
showDialog01(); // 아래 showDialog01() 함수 호출
}
});
}
// dialog01을 디자인하는 함수
public void showDialog01(){
dilaog01.show(); // 다이얼로그 띄우기
/* 이 함수 안에 원하는 디자인과 기능을 구현하면 된다. */
// 위젯 연결 방식은 각자 취향대로~
// '아래 아니오 버튼'처럼 일반적인 방법대로 연결하면 재사용에 용이하고,
// '아래 네 버튼'처럼 바로 연결하면 일회성으로 사용하기 편함.
// *주의할 점: findViewById()를 쓸 때는 -> 앞에 반드시 다이얼로그 이름을 붙여야 한다.
// 아니오 버튼
Button noBtn = dilaog01.findViewById(R.id.noBtn);
noBtn.setOnClickListener(new View.OnClickListener() {
@Override
public void onClick(View view) {
// 원하는 기능 구현
dilaog01.dismiss(); // 다이얼로그 닫기
}
});
// 네 버튼
dilaog01.findViewById(R.id.yesBtn).setOnClickListener(new View.OnClickListener() {
@Override
public void onClick(View view) {
// 원하는 기능 구현
finish(); // 앱 종료
}
});
}
}
|
cs |
4) 사용 화면
첫 화면

커스텀 다이얼로그를 띄운 화면
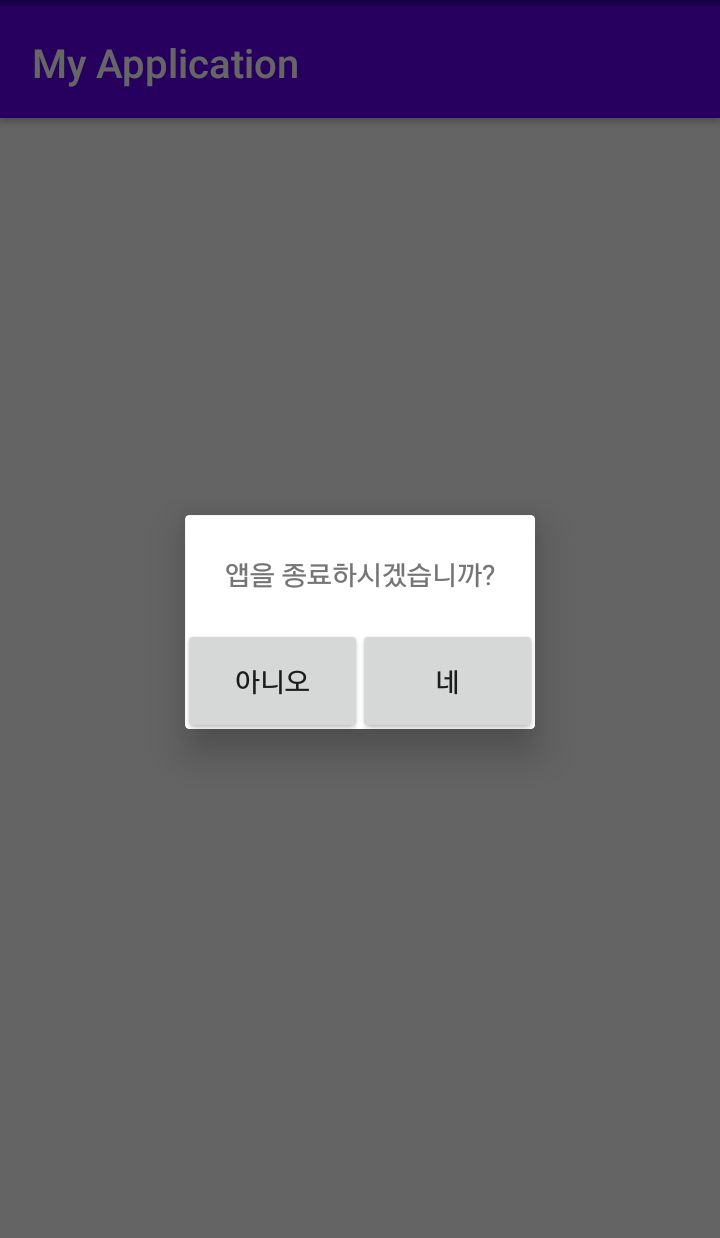
'아니오'를 누르면 다이얼로그가 닫히고
'네'를 누르면 앱이 종료된다.
물론 각각 원하는 기능을 구현하면 된다.
'Android 개발 > android :: 예제' 카테고리의 다른 글
| [안드로이드] 웹뷰(WebView) - 초간단 웹브라우저 예제 (with 로딩바(ProgressBar)) (2) | 2020.08.17 |
|---|---|
| [안드로이드] 커스텀 다이얼로그(Custom Dialog) 둥글게 모서리 디자인하기 (feat. 투명 버튼) 초간단 예제 (0) | 2020.08.16 |
| [안드로이드] 간편한 데이터 저장 SharedPreferences 사용법 초간단 예제 (0) | 2020.08.10 |
| [안드로이드] 기본 알림창 AlertDialog로 팝업 다이얼로그 띄우기 (1) | 2019.08.28 |


댓글